
Which ransomware targets the education sector?
Both education and healthcare sectors are being targeted by PYSA ransomware. These targets are specially chosen as they hold Personal Data, and use the Windows Operating System
How?
The means of access is Pysa and ChaChi Remote Access Trojan.
Pysa ransonmware
RAT
https://blogs.blackberry.com/en/2021/06/pysa-loves-chachi-a-new-golang-rat
What?
What happens next, once they’ve breached a target site?
Key highlights of the PYSA campaign include:
- Defense Evasion: PowerShell scripts to uninstall/stop/disable antivirus and other essential services.
- Credential Access: Dumping credentials from LSASS without Mimikatz (comsvcs.dll).
- Discovery: Internal network enumeration using Advanced Port Scanner.
- Persistence: ChaChi installed as a Service.
- Lateral Movement: RDP and PsExec.
- Exfiltration: Likely over ChaChi tunnel (not observed).
- Command and Control (C2): ChaChi RAT.
How do they achieve persistence?
Persistence
Shortly after its initial execution ChaChi decodes a service name and service description:
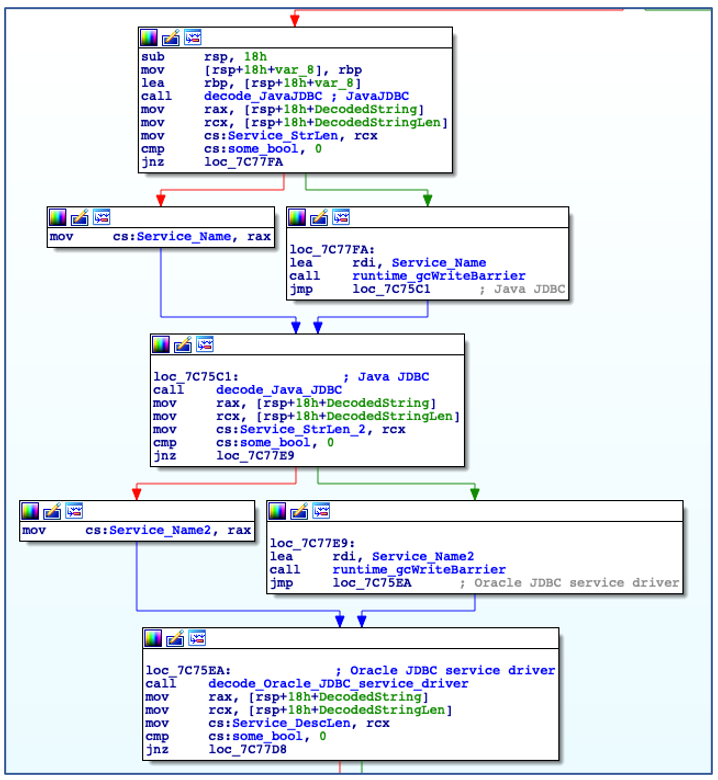
Decode Service Name and Description.
Using the decoded service name, ChaChi enumerates all installed services to check if a service with the same name already exists. In this case, it is named “JavaJDBC”. If a service with the specified name is found, then ChaChi will randomly select another service name from a hardcoded, albeit gobfuscated, list of service name strings:
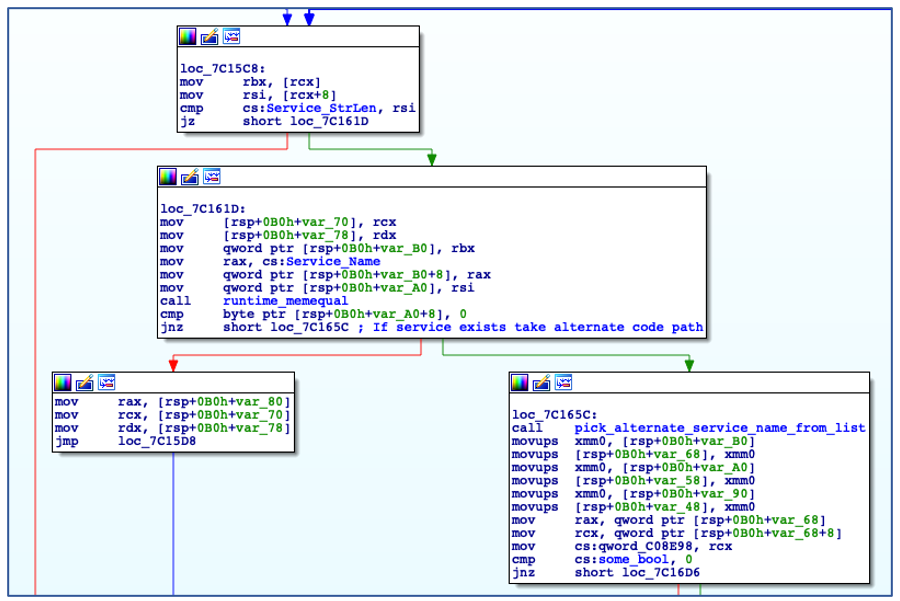
Check if Service Name Exists.
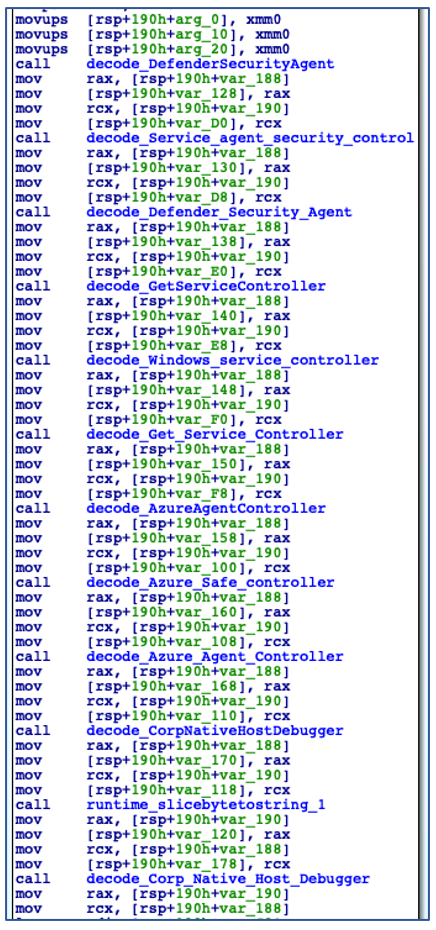
Decoding Alternate Service Names.
After determining an appropriate name to use for service installation, ChaChi then checks to see if it has sufficient administrator privileges to carry out the service creation operation:
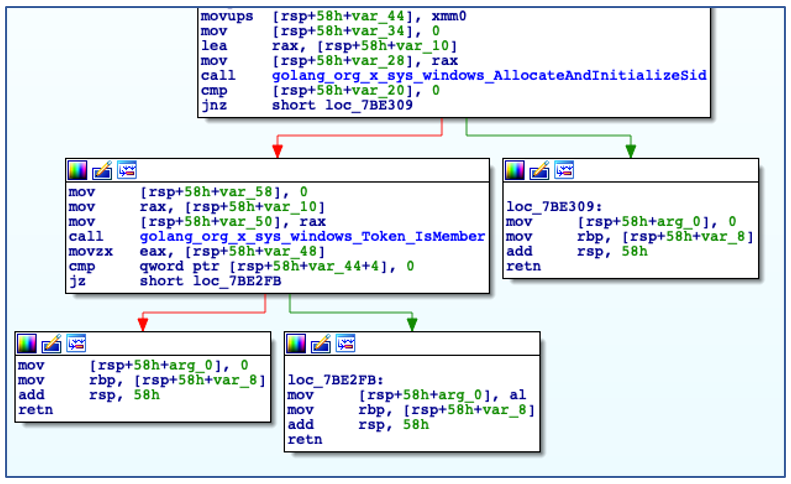
Checking if running with Administrative Privileges.
If ChaChi is not running with administrative privileges, it bypasses its persistence code and begins to initialize command-and-control (C2) communications. If the backdoor is running with administrative privileges, it will install itself as a new service that is configured to auto-start, before manually starting the service:
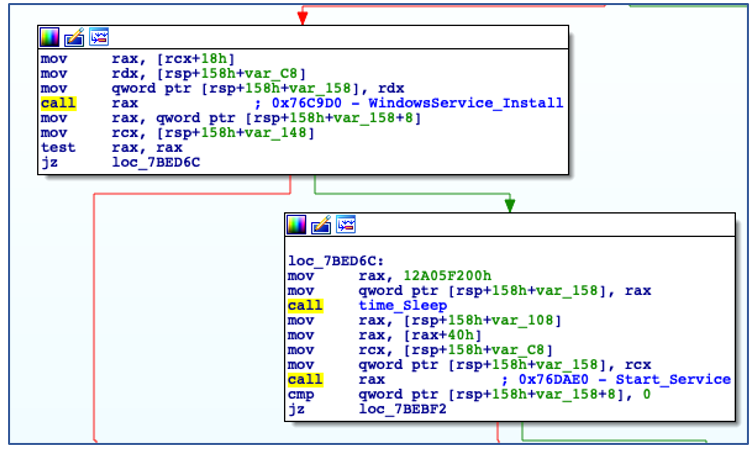
Install as Service and Start the Service.
C2 Communications
ChaChi utilizes two protocols for C2 communications: DNS and HTTP. The primary, preferred method of C2 communication is DNS tunnelling using TXT queries.
TXT or “text” records were originally intended to allow domain admins to associate arbitrary text with a domain, such as domain ownership information or network and server information. Threat actors have taken advantage of this for their own nefarious needs by encoding data in these TXT queries, which is a form of DNS tunnelling.
Decoding C2 IPs and Domains
ChaChi is preconfigured with a list of C2 domains for DNS tunnelling, as well as IP addresses for HTTP C2 failover. The domains are encoded just like any other string in a gobfuscated binary, using a dedicated function that carries out the XOR decode process:
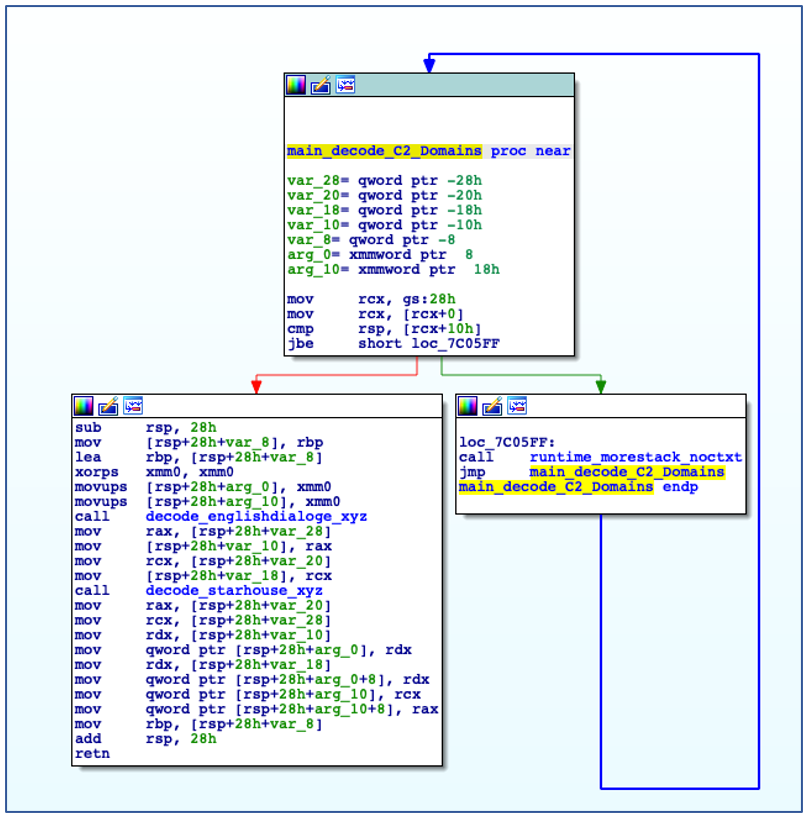
C2 Domains are Decoded from Gobfuscated functions.
The domain that will be used is chosen at random through the use of “Intn” from the “rand” package, which is seeded by the value returned from an earlier call to “time.Now”:
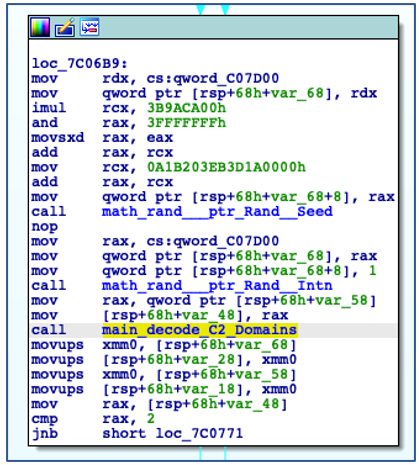
Randomizing C2 Domain Selection.
The decoding of the C2 IP addresses is a little more complicated, although not overly so. As with the C2 domains, the inevitable selection of a C2 IP address is also randomized through calls to “time.Now”, “rand.Seed” and “rand.Shuffle”. The C2 IP decoding function takes several arguments: a pointer to the encoded C2 IP array, an integer value indicating the number of encoded IP addresses, and a hex number used in the decoding of each octet of each IP address. The decoding of the C2 IP addresses works as follows:
- Read a word (2 bytes) at the initial offset into the C2 IP array determined by the earlier shuffle.
- Subtract the hex number (0xA in all observed cases) from the retrieved value.
- Convert the result to its base 10 equivalent (thereby creating a single octet of an IP).
- Repeat 4 times per encoded IP.
- Join the decoded octets with a “.” (thus fully decoding a stored C2 IP address).
These steps are repeated until all IP addresses have been decoded
C2 Communications Failover.
This failover method is not ideal for the ChaChi operators. It does not offer the encryption afforded to the DNS tunnelling, and it is nowhere near as covert.
The HTTP C2 communications are performed using POST requests to one of the randomly selected C2 IPs decoded earlier. The content of the HTTP POST is encoded using Base64 and XOR encoding to offer some level of data protection, in the same way as the data was encoded prior to being serialized into the “ChunkData” messages in the case of DNS tunnelling.
Should the C2 check-in fail, it will rotate through the other decoded C2 IPs in an attempt to create a connection. If a connection is established, ChaChi will encode and send POST requests to the C2 and process its responses:
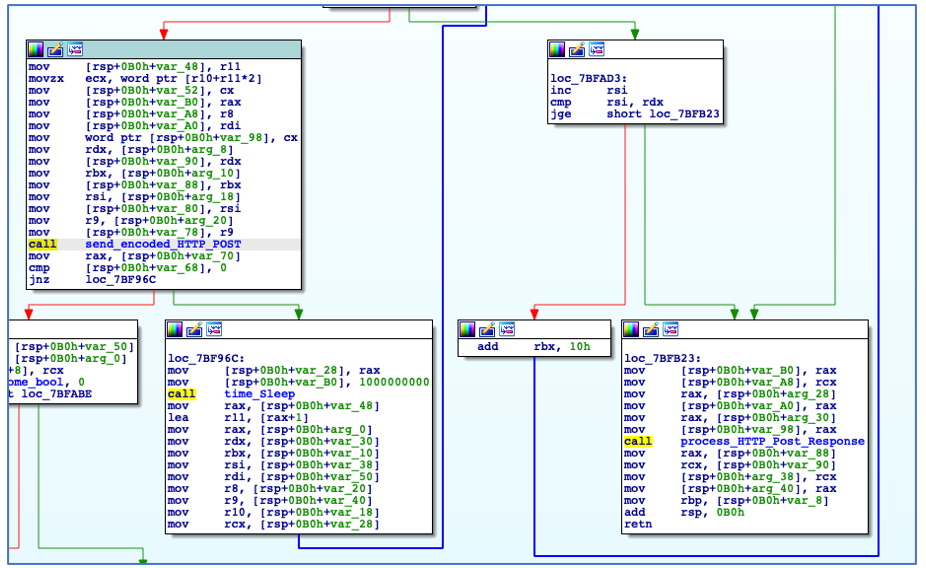
HTTP POST Request and Response Processing.
Decrypting C2 Traffic
As the use of HTTP for C2 communications is less complicated and involves less steps when compared to DNS tunnelling, this section will focus on decryption of DNS traffic.
Decryption of both HTTP and DNS C2 traffic is possible because, once we obtain both the XOR and encryption keys, we can reverse the process that has taken plaintext data and converted it to an encrypted form. Each phase in the encoding and encryption process is reversible:

Encoding and Encryption Process to generate TXT Query.
To do this, we perform the following steps:
- Retrieve DNS TXT queries from packet captures or DNS logs.
- Strip the domain name and “.” separators.
- Decode the string from hex back to bytes.
- Run the decoded content along with the recovered encryption key through a XSalsa20+Poly1305 decryption process.
- De-serialize the decrypted data in order to access the packet field of the “ChunkData” messages – other message types are fully decrypted at this point.
- Apply XOR decoding using the recovered XOR key to the packet field of each “ChunkData” message.
- Base64-decode the result of the XOR operation.
The result of the above process yields decrypted and de-serialized protocol buffers as well as the original data that was encoded and packed into “ChunkData” packets.
Yara Rule
The following Yara rule was authored by the BlackBerry Threat Research Team to catch the threat described in this document:
| rule Mal_Backdoor_ChaChi_RAT { meta: description = “ChaChi RAT used in PYSA Ransomware Campaigns” author = “BlackBerry Threat Research & Intelligence” strings: // “Go build ID:” $go = { 47 6F 20 62 75 69 6C 64 20 49 44 3A } // dnsStream $dnsStream = { 64 6E 73 53 74 72 65 61 6D } // SOCKS5 $socks5 = { 53 4F 43 4B 53 35 } // chisel $chisel = { 63 68 69 73 65 6C } condition: // MZ signature at offset 0 uint16(0) == 0x5A4D and // PE signature at offset stored in MZ header at 0x3C uint32(uint32(0x3C)) == 0x00004550 and // ChaChi Strings all of them } |
Reference:
https://blogs.blackberry.com/en/2021/06/pysa-loves-chachi-a-new-golang-rat
